
If you run/manage an online store/app, you may never know, which landing pages and/or campaigns are driving sales and which are not. You need Google Analytics Ecommerce tracking set up for your website.
It is only by using Google Analytics ecommerce tracking, you can correlate sales data with website usage data like sessions, bounce rate, traffic source/medium, landing pages etc.
Before you can set up ecommerce tracking, you need to install Google Analytics on your website.
Google Analytics (GA) is a free online tool which is used by millions of websites all over the world, which lets you analyze data from all touchpoints in one place, for a deeper understanding of your customer experience.i
i am not a Certified web analyst but i have written this article by research alot of resources and abit of user experience i have while setup on my client.
First you need to login with your Gmail account. And install/add GA to track your website from this link https://www.google.co.uk/analytics/analytics/#?modal_active=none. After that GA provide a snippet of code which we will place on your website. After then, as soon as your website is loaded into the visitor’s web browser, the Google Analytics Ecommerce tracking code is executed which then sends the e-commerce data to Google Analytics server.
Google Analytics server then, process the collected ecommerce data and then send it, to your GA account. That’s how, the ecommerce data become available in various GA reports.
Below is the screenshot of the configuration/steps you need to do after you install/add GA
Step1: The first thing you need to do, is select the right property (website) in the Home tab of Google Analytics. Once you’ve done that, click the “Admin” tab and then click “Ecommerce Settings”: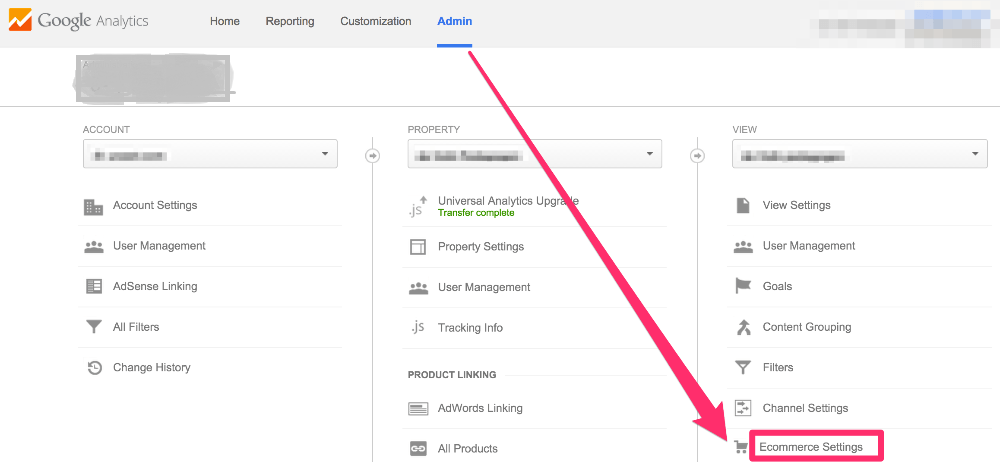
Step 2: Once you click that, you’ll see this view: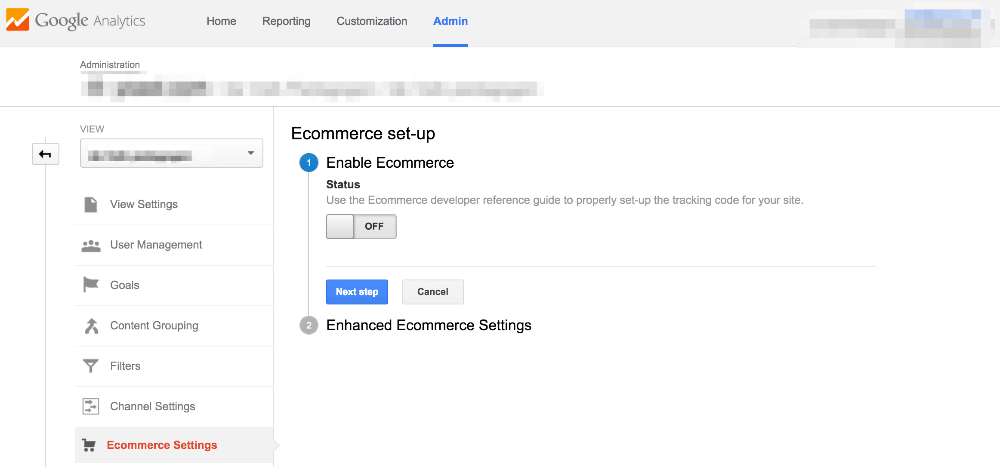
Step 3: Select the “Status” button so it turns to “ON” and click the “Next step” button, you’ll see this: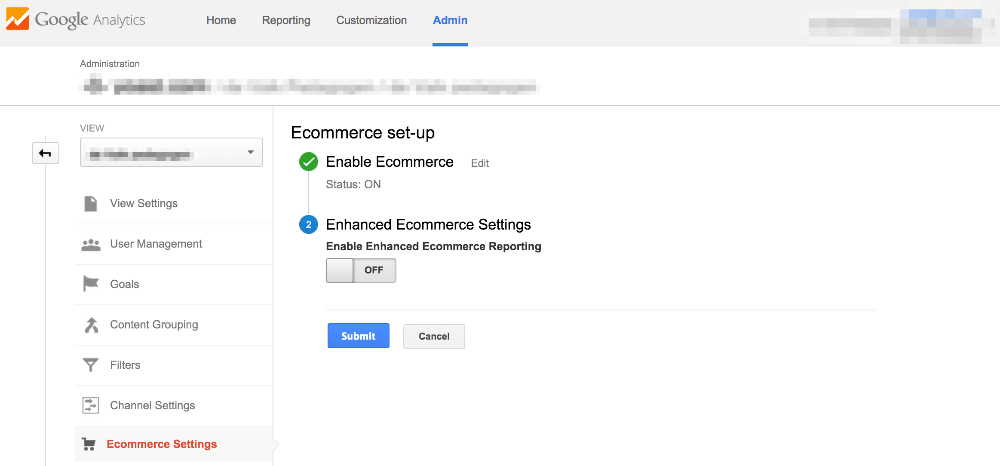
You can turn the Enhanced Ecommerce Settings, but it’s not obligatory. If you enable you need to set few things as shown below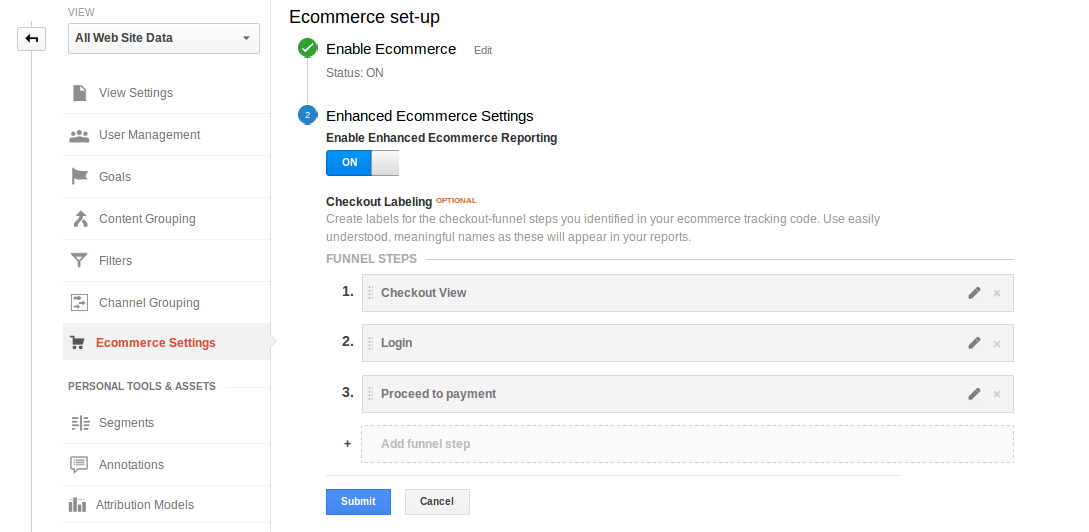
Also, add meaningful labels for your checkout steps. We recommend you to label as,
- Checkout View
- Login
- Proceed to payment
Step 4: Add Tracking Codes in the website. https://support.google.com/analytics/answer/1032385?hl=en. Then modify your tracking code to also include the ecommerce tracking as like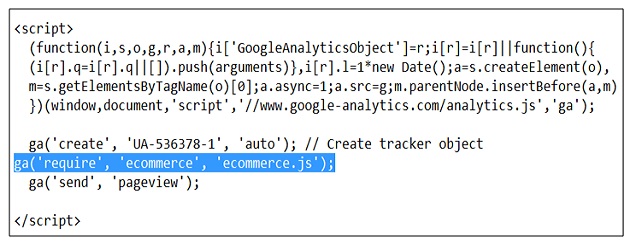
Where ‘UA-536378-1’ is a Google Analytics IDwhich vary from your analytics
Note:
- It can take 24-48 hours before your ecommerce tracking will actually start working.
- Also plugin available for WordPress WooCommerce : https://wordpress.org/plugins/woocommerce-google-analytics-integration/